

Struggling to find the perfect window treatments for your home? We’ve been there too, constantly searching for that balance of style, practicality and accessibility. With many window treatment options being overly expensive or not quite right, we’ve delved into the world of DIY Roman blinds.
This charming solution might just be what you’re looking for! Let’s sail through crafting and installing these timeless accents together.
Key Takeaways
- Roman blinds are an elegant and practical alternative to traditional curtains, offering design flexibility, easy maintenance, and light control options.
- Making DIY Roman blinds requires materials such as fabric, scissors, a ruler or measuring tape, a blind cord or string, and a sewing machine.
- To clean Roman blinds, use a vacuum cleaner with a brush attachment for regular dusting and spot-clean with a mild detergent and warm water solution. Take care not to saturate the fabric.
- Accurate measurements are crucial for installing Roman blinds properly. Measure the width of the window frame from inside edge to inside edge, and the height from the top of the window frame to where you want the blind to end.

What are Roman Blinds?
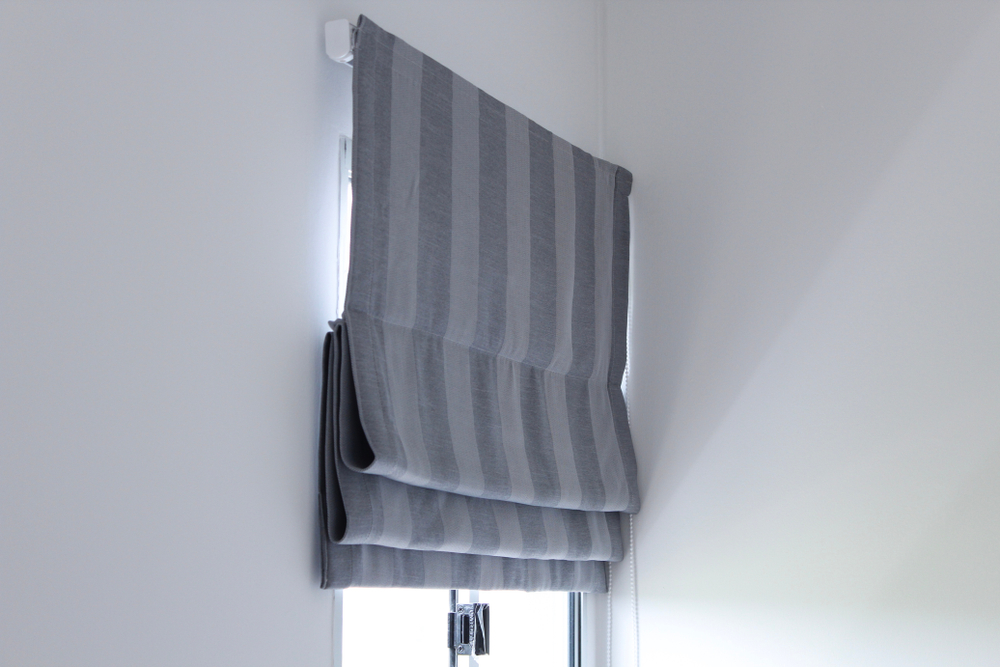
Roman blinds are window treatments that consist of fabric panels that fold up in horisontal pleats when raised and lay flat when lowered, providing a sleek and elegant look to any space.
They are a popular alternative to traditional curtains and offer various benefits such as design flexibility, easy maintenance, and light control options.
Definition and explanation
Roman blinds or shades, as they are often called, serve as a chic and efficient alternative to traditional curtains. They operate on a cord system that gathers the fabric into elegant folds when raised.
Essentially, these blinds provide an added layer of comfort by blocking light and insulating windows while adding style to any room. With materials ranging from bamboo to cloth and patterns varying widely, Roman blinds offer design flexibility that caters to diverse tastes in home decor.
Plus, there’s even an option for DIY enthusiasts who wish to customise their own window treatments!
Benefits of Roman Blinds
Roman blinds offer a range of benefits that make them a popular choice for homeowners. One key advantage is their timeless charm, adding an elegant and classic touch to any room. They also provide design flexibility, allowing you to customise your window treatments to match your interior decor.
Roman blinds can be made using various fabrics and patterns, giving you endless options for creating a personalised look. Additionally, they can be installed over existing blinds or used as standalone window coverings.
With their easy maintenance and simple installation process, Roman blinds are a practical and stylish choice for any home.
How to Make DIY Roman Shades with Blinds
To make DIY Roman shades with blinds, gather the necessary materials and tools such as fabric, scissors, a ruler or measuring tape, a blind cord or string, and a sewing machine. Measure and cut the fabric to fit your window size, then attach the blind cord or string to create the folding effect.
Sew along the edges to secure everything in place.
Materials and tools needed
To make your own DIY Roman blinds, you’ll need a few materials and tools. First, gather some midweight upholstery fabric in the colour or pattern of your choice. You’ll also need a mini blind with slats that can be removed, along with mounting brackets for installation.
Other essentials include a measuring tape, scissors for cutting the fabric to size, an iron for pressing seams, and thread and sewing needles if you plan on adding a lining to your Roman shade.
Don’t forget a drill or screwdriver for attaching the mounting brackets! With these materials and tools in hand, you’ll be ready to start creating customised window treatments that add charm and style to any room in your home.
Step-by-step instructions
We will now guide you through the step-by-step process of making your own DIY Roman blinds. First, gather all the necessary materials and tools, including a mini blind, fabric of your choice, scissors or rotary cutter, fabric glue or sewing machine, measuring tape, and a pencil.
Next, carefully remove the slats from the mini blind and set them aside. Measure and cut your fabric to match the size of your window. Then, attach the fabric to the mini blind by gluing or sewing it in place.
Finally, reattach the slats to create evenly-spaced folds in your Roman blinds. With these easy steps, you’ll have stylish custom window treatments that add a touch of elegance to any room in no time!
How to Sew a DIY Roman Shade with a Lining
For this step, you will need accurate measurements and a sharp pair of fabric scissors to cut both the main fabric and lining.
Measurements and Cutting
To make your own DIY Roman shade, accurate measurements and precise cutting are crucial. Before starting the project, gather a measuring tape, pencil, and paper to record the dimensions of your window.
Measure both the width and height of the window frame, noting these measurements carefully. When cutting your fabric for the shade, add extra inches to account for seam allowances and hemming.
Using sharp scissors or a rotary cutter with a straight-edge ruler, cut your fabric according to the measurements you recorded earlier. Remember to double-check your calculations to ensure that everything fits perfectly once it’s time to assemble your Roman shade.

Attaching the lining and dowel casings
Now it’s time to attach the lining and dowel casings to your DIY Roman shade. This step is crucial for adding structure and stability to your window treatment. Start by positioning the lining fabric on top of the face fabric, with their right sides together.
Pin them in place along the sides and bottom edge. Then, stitch a straight line about 1/2 inch from the edges, leaving the top open for now.
Next, create casings for inserting dowels that will help maintain the folds of your Roman shade when raised or lowered. Fold over about 1 inch at both ends of the lining fabric and sew along the folded edges to form pockets for dowels.
Remember to leave enough space between each casing for smooth operation.
Once you’ve attached all the casings, insert dowels into each one. These can be wooden or plastic rods that are cut to fit snugly within each pocket, extending across the width of your shade.
Assembling the Roman shade
To assemble the Roman shade, follow these steps. First, attach the dowel casings to the fabric at regular intervals using a sewing machine. Then, thread the cord through each casing and tie it securely at both ends.
Next, insert small wooden dowels into each casing to create structured folds in the shade. Finally, mount the brackets on your window frame or wall and hang the Roman shade by inserting it into the brackets.
Enjoy your newly assembled Roman shade that adds style and functionality to your windows!
Unique Ideas for DIY Roman Shades
Incorporate plaid, floral fabric, and geometric patterns for a trendy and personalised look. Use mini blinds and tension rods for a budget-friendly option. Customise for long windows or create reversible shades for added versatility.
Incorporating plaid, floral fabric, and geometric patterns
We love the idea of adding some personality to your DIY Roman shades by incorporating different patterns and fabrics. Plaid, floral fabric, and geometric patterns can all add an extra touch of style to your window treatments.
You can mix and match these patterns or choose one that complements the decor of your room. By using different fabrics in unique patterns, you can create a custom look for your Roman blinds that is truly one-of-a-kind.
So don’t be afraid to get creative with your fabric choices and embrace the versatility and design flexibility that plaid, floral fabric, and geometric patterns have to offer!
Using mini blinds and tension rods
To further customise your DIY Roman shades, consider using mini blinds and tension rods. Mini blinds can be a great base for your Roman shade, providing structure and support. Simply remove the slats from the blind and attach your chosen fabric in its place.
This allows you to easily match your shade to existing decor or create a unique look with patterned or textured fabric. Tension rods are another handy tool for installing Roman shades without drilling into walls or window frames.
These adjustable rods fit securely within the window casing, holding the shade in place while still allowing for easy adjustment and removal when needed. With mini blinds and tension rods, you can add versatility and convenience to your DIY window treatments.
Customising for long windows and creating reversible shades
For those with long windows, customising Roman blinds is a must. By measuring your window accurately and selecting the right fabric, you can create beautiful shades that perfectly fit the length of your windows.
To add even more versatility to your window treatments, consider making them reversible. This way, you can have two different looks in one shade by simply flipping it over. With these customisation options, you can ensure that your Roman blinds are not only functional but also enhance the overall aesthetic of your home.

How to Clean and Install Roman Blinds
To keep your Roman blinds looking pristine, we’ll share some easy cleaning tips and methods. Plus, we’ll guide you through measuring and installing the blinds for a flawless finish.
Cleaning tips and methods
Cleaning your Roman blinds is an essential part of maintaining their beauty and functionality. To keep them looking fresh and dust-free, start by using a vacuum cleaner with a brush attachment to gently remove any loose dirt or debris.
For more thorough cleaning, you can spot-clean the fabric with a mild detergent and warm water solution. Avoid saturating the fabric, as this may cause damage or discolouration. Instead, lightly dab the stained area with a clean cloth or sponge.
If your blinds have removable slats, take them off for easier cleaning. Finally, always make sure to follow the manufacturer’s instructions for cleaning specific types of fabrics to avoid any potential damage.
Measuring for installation
To ensure a perfect fit for your DIY Roman blinds, accurate measurements are crucial. Start by measuring the width of your window frame from the inside edge to the inside edge. Take three separate measurements and use the smallest one to ensure a snug fit.
Next, measure the height from the top of the window frame to where you want the Roman blind to end. Again, take three measurements and use the smallest one. Remember to account for any obstructions like handles or locks when taking these measurements.
With precise measurements in hand, you’ll be ready to create custom Roman blinds that will perfectly accentuate your windows.
Steps for proper installation
To properly install your DIY Roman blinds, follow these simple steps. First, gather all the necessary materials and tools mentioned in the previous sections. Next, measure your windows accurately to ensure a perfect fit.
Then, mount the brackets securely according to the manufacturer’s instructions. After that, attach the headrail or top of the blinds to the brackets. Finally, test the functionality of your blinds by raising and lowering them a few times to make sure they work smoothly.
With these steps completed, you can enjoy your newly installed custom window treatments with pride and satisfaction.
Create a Stylish Ambiance with All Screens and Blinds!
In conclusion, creating your own custom Roman blinds can be a fun and rewarding DIY project for any homeowner. With the right materials and step-by-step instructions, you can personalise your window treatments to match your style and save money in the process.
So why not give it a try and add some timeless charm to your windows?
At All Screens and Blinds, we believe in the art of personalisation. Our Roman Blinds not only offer exceptional window solutions but also provide you with the opportunity to take control of your home’s aesthetics, ensuring that every inch of your space showcases your creative flair. Submit your Enquiry Here!